DECEMBER 20, 2016 - DAY 16
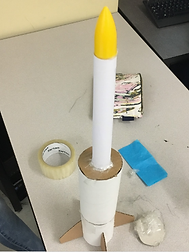
This is our final day constructing our rocket. Today, we attached all segments of the rocket together, added fire resistant paper and a straw to hold our rocket to the launch pad on the 4th of January. We also completed our website, and overall we are happy with our results.

DECEMBER 19, 2016 - DAY 15
Today we finished calculating the center of pressure. Now we are marking the rocket to make some final cuts to ensure the center of pressure is correct. The Rocket itself is practically constructed, and just needs to be fastened together into one whole structure.


DECEMBER 16, 2016 - DAY 14
Today we were given a formula for calculating center of pressure that was much easier to comprehend, easing our minds to an extent. We also began refurbishing our nose cone, going back to our original 8” tall design, whilst also wrapping paper around the tube to make it less rigid (since we had to glue two pieces back together). Since we only had half as much time than usual, we agreed upon calculating the center of pressure over the weekend, as well as constructing the fins if possible since we are on a time crunch.
DECEMBER 15, 2016 - DAY 13
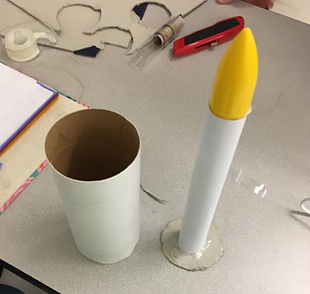
Finally we were able to put our engine inside the clear tube after shedding some of the outer-cardboard surrounding the base cylinder of our engine assembly compartment. After resolving that issue,we realized we had another. We had a basic center of pressure calculated, and noticed it was way off from where it should be. We assumed that the nose cone was so disproportionate to the rocket that it was causing the offset calculation, so we began to redesign our nose cone to see if it would help. This caused a lot of conflict since we were unsure of what we could improvise with given the time we had left.

DECEMBER 14, 2016 - DAY 12
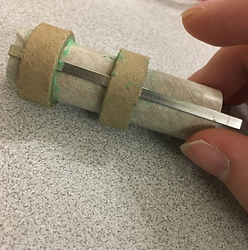
Today we were given our engine to assemble for our rocket. This process went well when constructing the engine, but began to fall apart since we could not fit the engine within the 1” diameter tube. The engine’s diameter was about a quarter inch off from the tube. This became frustrating so we set aside the engine assembly to see if we could recalculate our center of pressure, but still had difficulties.
DECEMBER 13, 2016 - DAY 11
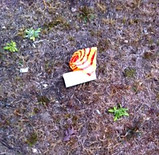
The egg drop was today and we were able to collect data on how well our escape pod works. The drop lasted a total of three seconds because our parachute did not deploy, but luckily the egg survived. With this information, we were able to identify that we must reposition our parachute since it does not provide drag or catch air well where it currently is. We have also been notified a NASA specialist was coming in to help with our designs, so we prepared questions to ask. Our main question is how to calculate the center of pressure of a rocket, and what use does it serve.


DECEMBER 12, 2016 - DAY 10
Our escape pod has been finished with all shock absorbent material inside. After finishing up our parachute, we attached it to the open side of the cylinder and tested its functionality. So far from what we can infer, it works well.

DECEMBER 09, 2016 - DAY 9
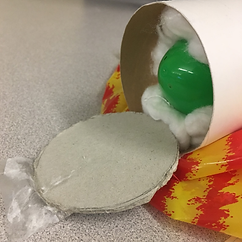
The main escape pod compartment has been complete, with two 3” diameter cardboard cutouts encasing a section of the cylinder where the egg and cotton would be placed in. Now, we have to attach a parachute to out rocket, so we began tying strings to our parachute material we received.


DECEMBER 08, 2016 - DAY 8
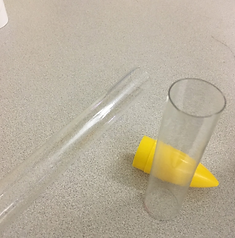
Today we received our clear plastic tube, parachute, nose cone, and two 3” diameter cylinders; one being the final piece to our escape pod. Now that we have our escape pod compartment we began constructing the base of the escape pod where the egg would presumably rest.

DECEMBER 07, 2016 - DAY 7
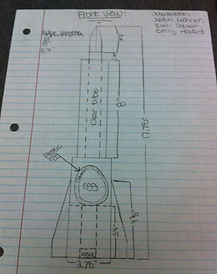
Our model and drawing for our rocket have been finalized, and we now have a good idea on how to construct our rocket. Our expenditure for our escape pod was calculated and currently lies at $335,000. So far so good.


DECEMBER 06, 2016 - DAY 6
We made revisions to our rocket design after we finalized our 2d drawing. Originally, the connecting part of the nose cone was going to span 8” in height, but we decided to reduce it to four, since we were afraid 8” would be way too tall for the rocket to withstand. All materials were brought in for our escape pod, and we set them aside for construction tomorrow.


DECEMBER 03, 2016 - DAY 5
The models were worked on today and we were left with many concept ideas to choose from. This became a little overwhelming since we could not come to a consensus on just one of the designs. We began to gravitate towards finding our center of pressure, which was tedious and confusing; ultimately, we were not able to finish the task. Today was not a very productive day, but helped us understand what needed to be addressed later on.


DECEMBER 02, 2016 - DAY 4
Today we discussed our final rocket design and we plan to draw out some orthographic drawings for our rocket and hopefully begin modeling by tomorrow. We also finalized our egg escape pod idea, and settled upon using a plastic Easter egg, cotton, and felt.
DECEMBER 01, 2016 - DAY 3
Our rocket concepts were drawn out today, and consideration of the recovery system was thought about. Our main concern is with the rocket assembly itself. We are unsure about the limitations given, but hope to overcome them by tomorrow.

NOVEMBER 30, 2016 - DAY 2
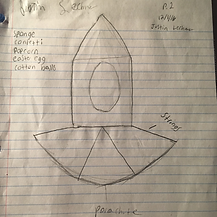
As of today we brainstormed materials for our escape pod. We decided that items such as sponges, tennis balls, bubble wrap, cotton, popcorn, and felt were all good materials to implement because they can absorb shock, and ultimately protect the egg. We also began brainstorming the conceptual idea of what the escape pod would look like, and where it would be placed on our rocket.
NOTES: engine must be in 1” small clear tube for rocket.

NOVEMBER 29, 2016 - DAY 1
Today we created our website to document all processes over the course of this project. Our jobs were also assigned today in order to ensure all work was accounted for.


Rocket Daily Overview
JANUARY 3, 2017 - DAY 17
Today we had to remove weight from our rocket so that the nose cone will pop off at the correct altitude. With this we also learned that we will be getting a smaller egg that only weighs .3 ounces instead of 3 ounces. To meet these new weight requirements we had to get rid of some of the tubing and extra cotton.
Another change we made was swapping the plastic nose cone for a paper one.

